
So I am SUPER excited for my first real post on here!!


~: Smokey Purple Eyes :~
I LOVE this variation of the regular black and grey smokey eye and I like that the purple really brings out the green in my eyes.. Especially since one is more green than the other :)
Start off with your foundation base.
I use 'Maybelline Dream Liquid Mousse' in Light 2 and then set it with 'Australis Fresh & Flawless Pressed Powder' applied with my stipple brush. Even though the Maybelline has a matte finish I find the powder sets it perfectly and lasts all day long.

I have super light eyebrows so I fill them in also using my eyebrow pencil (Rimmel London Professional Eyebrown Pencil in 001 Dark Brown) and then lightly brush over them with my everyday brown eyeshadow using my MAC 208 Angled Brow Brush.
The pencil works fine and it's all I do when I'm in a hurry but the powder fills in all the extra spots perfectly.

Line your eyes on both lids using whatever eyeliner you use. I initially use my pencil (Rimmel London Soft Kohl Pencil in 061 Jet Black) and then reline in my liquid eyeliner when I'm finished.
 Using a flat shader brush, (I use the MAC 214 Short Shader Brush) use the darkest purple you decide on using to do the first eye shadow colour application. I used the Vibrant Grape MAC shadow because it's really buildable. You can use as much or as little as you want to get differeny intensities.
 Fill the brush and run it above the eyeliner line on your upper lid. I go all the way into the corner to define my eyes more but you can do this later with a smaller brush if you need to.
To get the perfect shape on the outer edge of the eye with the shadow, I find the easiest way is to follow the curve of your lower lash line up with your eyes open. it looks the best and the most natural. Then fill in the crease on the eyelid, tapering it down towards the inner edge.

For the colour in the lid I mix two of my MAC shadows together. I use the Fig. 1 shade (the darker of the two) and Crystal. I love that the Crystal shade gives the Fig. 1 a really great shimmer.
 Load up your brush and fill the space left by the Vibrant Purple eye shadow in, really bending the darker purple into the shimmer mix.
 Again what i love about MAC eye shadows is that they blend REALLY easily. To say I am addicted to MAC is an understatement!!
Make sure you leave a small space in the inner corner of your eye for the highlight.
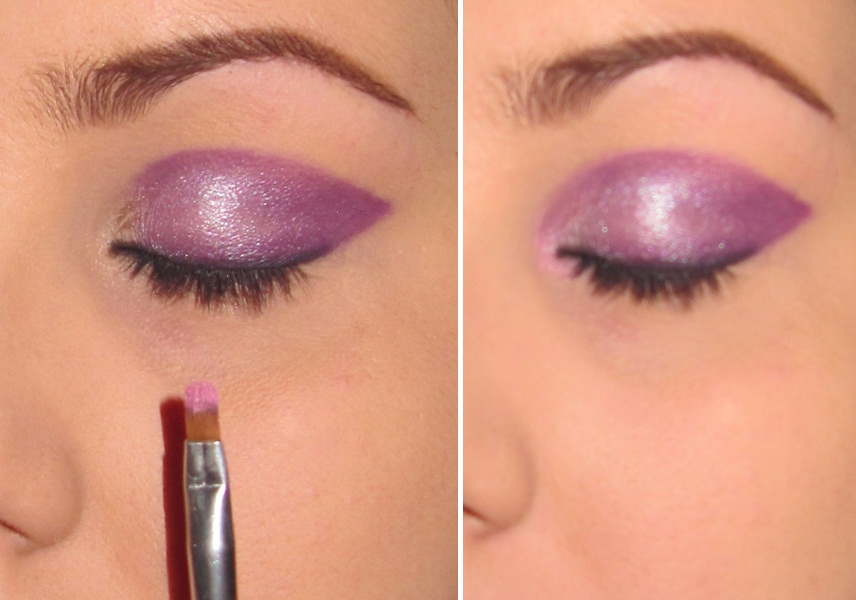
For the highlight colour I chose MAC's Pink Freeze eye shadow. Using the pink really makes the eye *POP* I think because it breaks away from the purple and brightens the eye up a lot.
 I break away from the conventional here and use a lip brush to apply the pink. I find the smaller tip really helps add the colour where I need it without too much powder mess on the upper cheek. I love using MAC brush 316 Lip Brush for this but any small brush will do (219 Pencil Brush works amazingly too!)
Apply the colour on the inner corner of the eye and extend it around to the lower lash line. I fill in about 5mm of colour on the lower lash to brighten up my eye.

Using the same small brush fill in the rest of the lower eyelid with the Vibrant Grape and the
Fig. 1/Crystal mix and blend it in with the black eyeliner.

Now get the Fig. 1/Crystal mix again and put a good amount on a medium sized brush. Use this to run over the highest edge of the purple outline to blend it into the brow bone. It doesn't take much blending to fade the line.

Now you can stop here if you prefer, but for a BOLD look add some sexy false eyelashes (I'm wearing my FAVORITE Ardell 118's.. Seriously I have about 5 pairs of them!)and reline your lashline with liquid eyeliner.
And now the finished product :D


I really love this look and think it's perfect when you want a dramatic eye but don't want a dark black look.
Yay you look great, it looks great, love the walkthrough, keep it going hun!
ReplyDeleteAurélie xx